In this short tutorial, we will create an example stack with information about our work that we want to share with colleagues. We assume that the information consists of a short explanation of the stack, a powerpoint presentation, a video with background information, and a link to our LinkedIn page.
You need to have a Learning Toolbox account for this short tutorial.
Contents
- Step 1 – Sign in to the Learning Toolbox Editor on the web
- Step 2 – Create a stack
- Step 3 – Find your way around the Stack Editor
- Step 4 – Fill in the basic stack settings
- Step 5 – Add a welcome message to your stack
- Step 6 – Preview the stack in the browser
- Step 7 – Open the stack on your mobile phone
- Step 8 – Find your stack in the Stack Store
- Step 9 – Edit the tile layout
- Step 10 – Set a background image on the tile
- Step 11 – Add a presentation to the stack
- Step 12 – Add a video to the stack
- Step 13 – Add a LinkedIn profile
Step 1 – Sign in to the Learning Toolbox Editor on the web
1. Go to Learning Toolbox my.ltb.io.
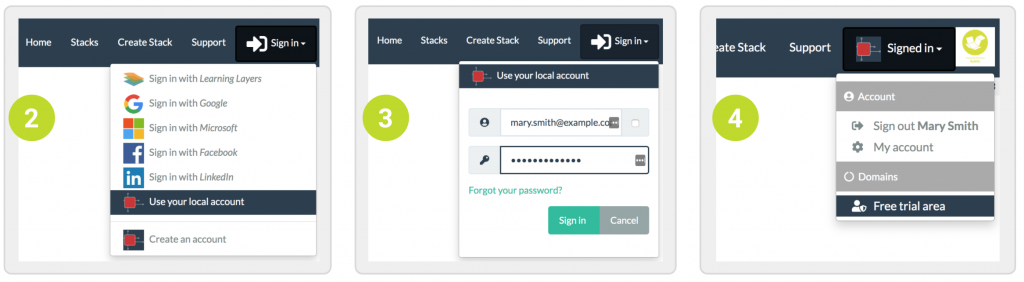
2. Click on Sign in and then on Use your local account.
3. Enter your email and password, and click on Sign in. To remember your email next time you sign in, click on the checkbox to the left of the email field.
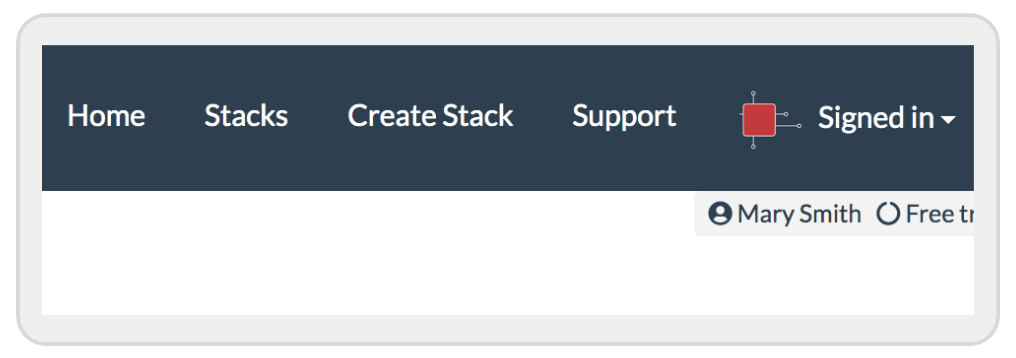
4. You will now see the domain that you are signed into in the dropdown list and next to your name on the top right. If you are in several domains, select the one you want to work in.
5. For further help, check out: Sign in to Learning Toolbox.
Step 2 – Create a stack
1. Click on Create Stack
2. If there are stack templates available for your domain, select Empty Stack. Otherwise skip this step.
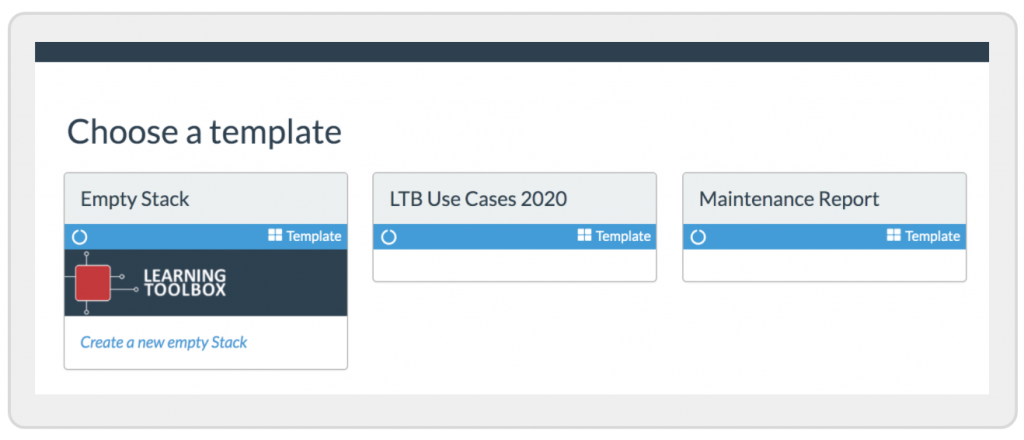
3. You will then be taken to the Stack Editor screen.
Step 3 – Find your way around the Stack Editor
There are three main work areas in the Stack Editor:
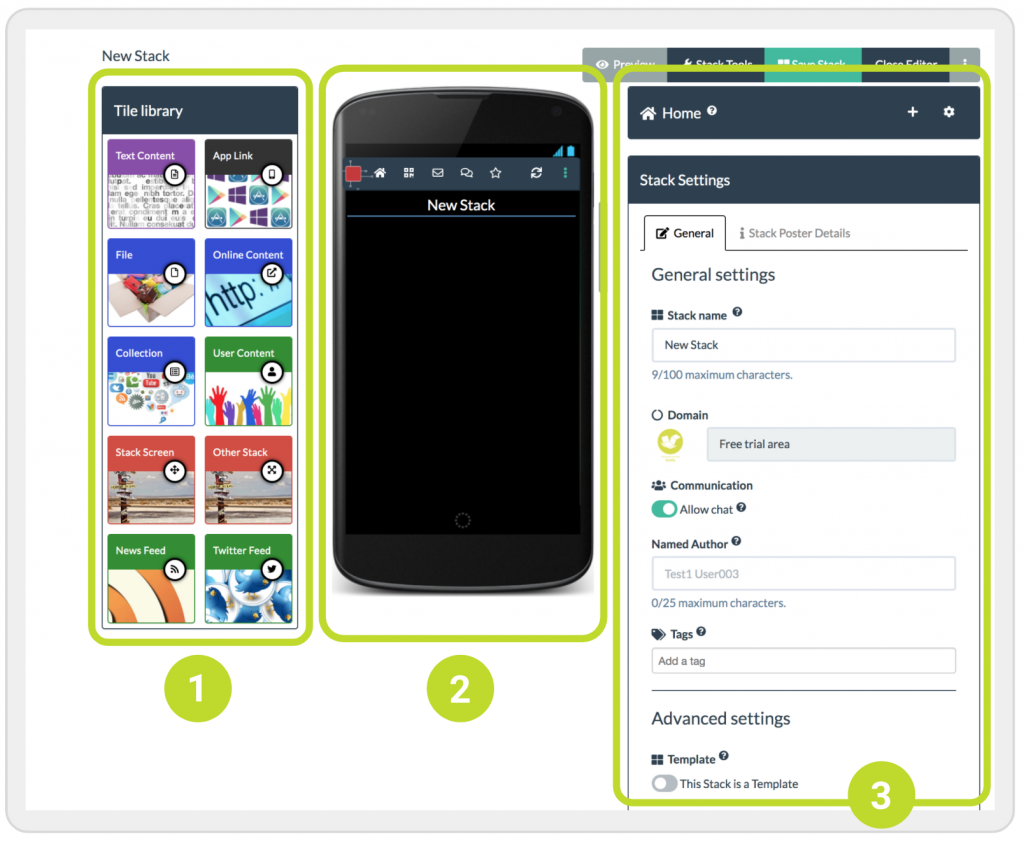
- The tile library, showing all the different types of content that you can add to your stack.
- The mobile screen, where you can see your stack as you build it.
- The settings area, which changes dynamically depending on which part of the stack you are editing
Very simply, the way you add content to your stack is by drag tiles from the tile library and dropping them into your stack and then fill in the information in the settings area.
Step 4 – Fill in the basic stack settings
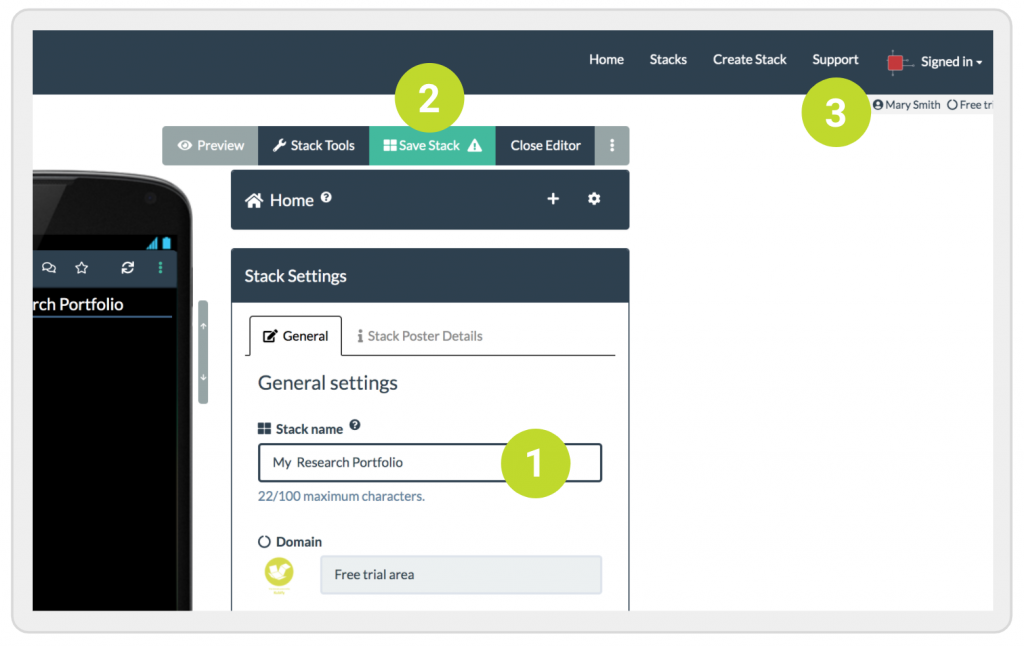
When you first open your stack you will see the general stack settings screen to the right. Here you can set your stack’s name. For this tutorial, we won’t need the other settings. In case you are interested, you can check out [ADVANCED SETTINGS].
- You can edit the stack name that appears at the top of the mobile screen at any time.
- Save your stack regularly so that your work does not get lost accidentally, for instance if you lose your internet connection.
- Check out the online Support page if you got questions are need help with any of the Learning Toolbox functionalities.
Step 5 – Add a welcome message to your stack
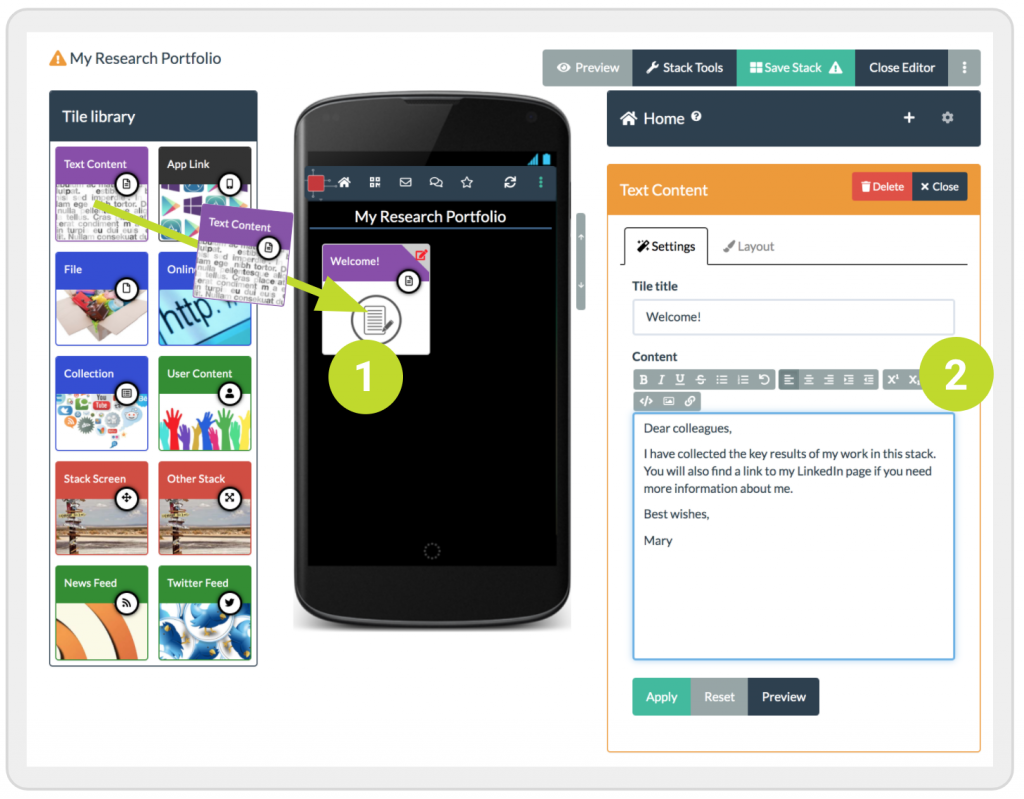
These steps show you how to add a short explanation to your stack using a text tile. The other tiles are added in the same way.
- Drag and drop a Text Tile from the Tile library into the mobile phone screen area.
- You will see the settings area change. Write a title for the tile in the Tile Title field. You will see the title immediately appear in the title bar of the tile. Then add a message for your colleagues in the Content area.
- Click on Save Stack.
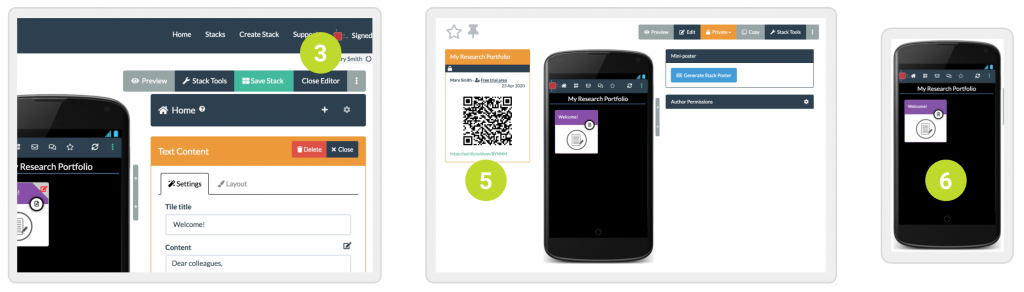
Step 6 – Preview the stack in the browser
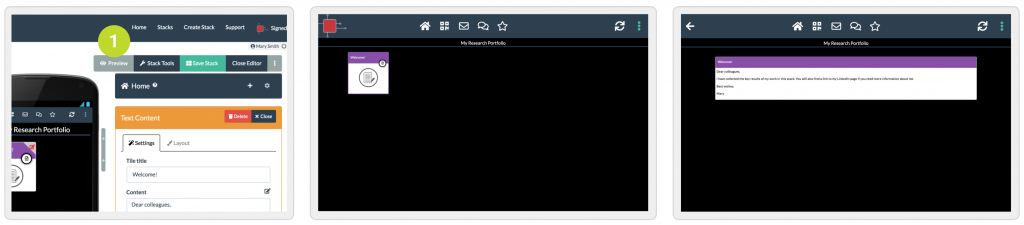
1. Click on Preview to see how your stack looks in a web browser. The stack opens in a new browser tab.
2. Click on the Welcome tile to see the content.
Step 7 – Open the stack on your mobile phone
1. Get the Learning Toolbox app. If you don’t want to download the app, you can also use your phone’s QR code reader in step 4 below.
2. Go back to the browser window where you are editing the stack.
3. Click on Close Editor.
4. Learning Toolbox has automatically generated a QR code for your stack. You can share your stack with others using the QR code or the link that is just below the code. Before you can share your stack with others, you need to set the stack permissions so others can open the stack.
5. Scan the QR code using the built-in QR code reader of the Learning Toolbox app. If you don’t want to install the app, you can also use your phone’s QR code reader. But we recommend you get the Learning Toolbox app and scan the QR code from within the app.
6. The stack will open in the Learning Toolbox app. Check out the help pages to find your way around the app.
Step 8 – Find your stack in the Stack Store
1. Whenever you login to Learning Toolbox you can return to your stack and add more content. To see your stack in the Stack Store, click on Stacks in the top menu. This will show you any staks that you have created in Learning Toolbox and also all visible stacks of other authors in the domain.
2. Click on the title bar of the stack you want to edit. This will open the stack in the View mode.
3. Now click on Edit.

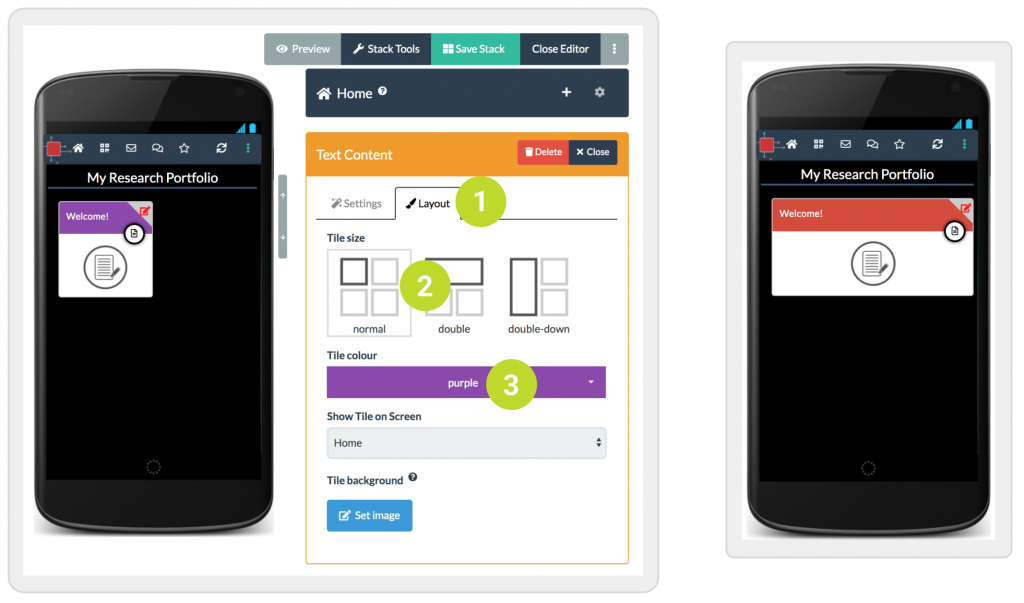
Step 9 – Edit the tile layout
1. Having returned to the tile editing view, now click on the Layout tab.
2. Click on the Double layout to make the tile wide.
3. Click on the Tile colour dropdown and select a different colour, for instance red.
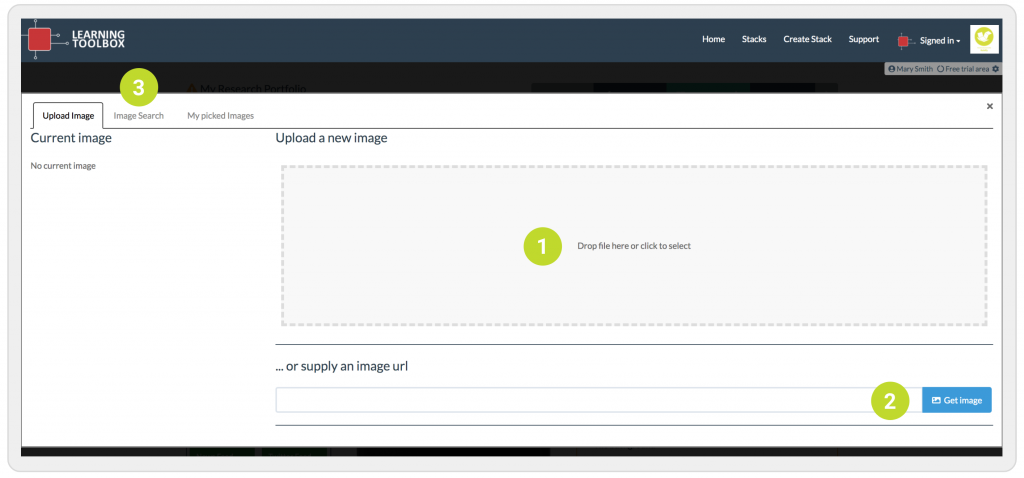
Step 10 – Set a background image on the tile
1. Still in the Layout tab, click on Set image.
2. This opens the image picker. There are three ways in which you can add an image.
3. You can upload an image from your computer by clicking on the grey rectangle and following the instructions.
4. You can provide a link to an image on the web and click on Get image.
5. Or you can select an image from the Pixabay repository of copyright free images by clicking on the Image Search tab. This is the method we are going to use here. Read on below.
6. After you’ve clicked on Image Search, type the word ‘pattern’ into the search box and hit return.
7. Select the colour red to get red patterns to match our tile colour.
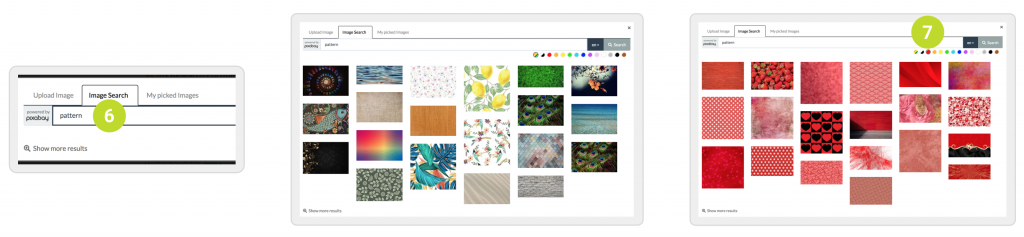
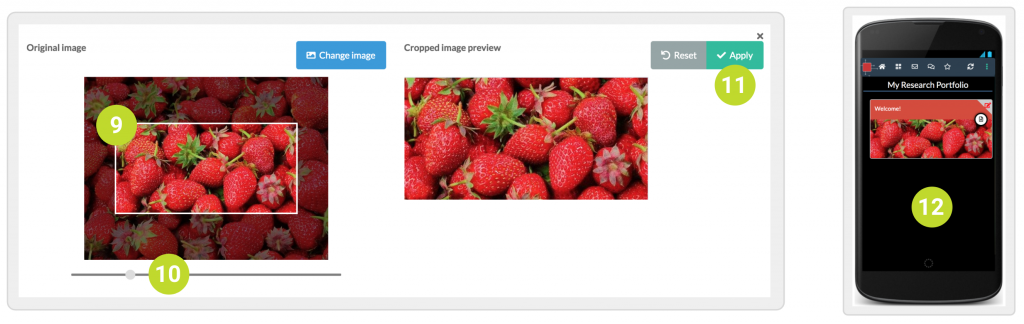
8. Click on any of the images to open the image editor where you can crop and resize the image.
9. You can crop the image by dragging and moving it so that the area you want appears within the focus area.
10. You can resize the image by using the slider.
11. Click on Apply when you are happy with the image preview. Be aware that you will lose the top section of the image as this will be covered by the tile title bar. Tip: to show the full image on the tile, you can hide the tile title bar by leaving the title field in the tile settings blank.
12. The image has now been added to the tile. Don’t forget to save the stack.
Step 11 – Add a presentation to the stack
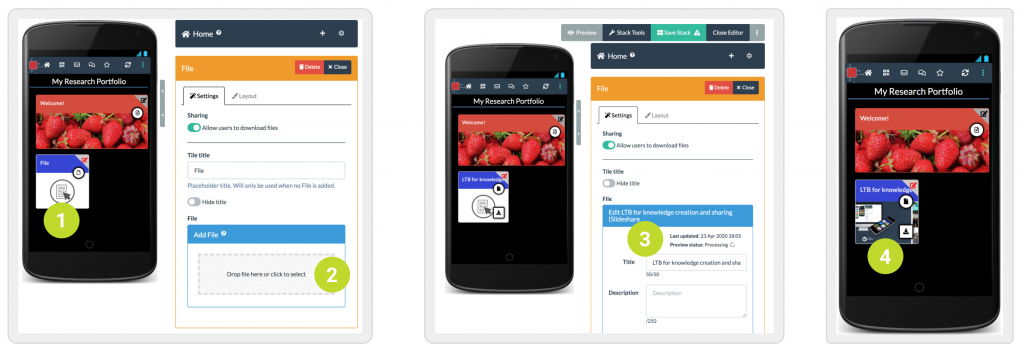
1. Drag a File Tile from the Tile Library and drop it into the stack.
2. Click on the gray area to open the file explorer. Select some PowerPoint presentation you got on your computer. If you don’t have a PowerPoint presentation, you can use any other document for this tutorial, for instance a Word document or a PDF.
3. After the presentation is uploaded, the Learning Toolbox will process it in the background and automatically create a PDF version that can be viewed on any device. You can see whether the document is still processing in the Preview Status.
4. Learning Toolbox has automatically created a tile image from the first slide of the presentation. You can of course change that by clicking on Set image at the bottom of the Layout settings and following the instructions in Step 10.
5. Click on Preview and then on the new tile to open the presentation. Try it out in the LTB app as well.
Step 12 – Add a video to the stack
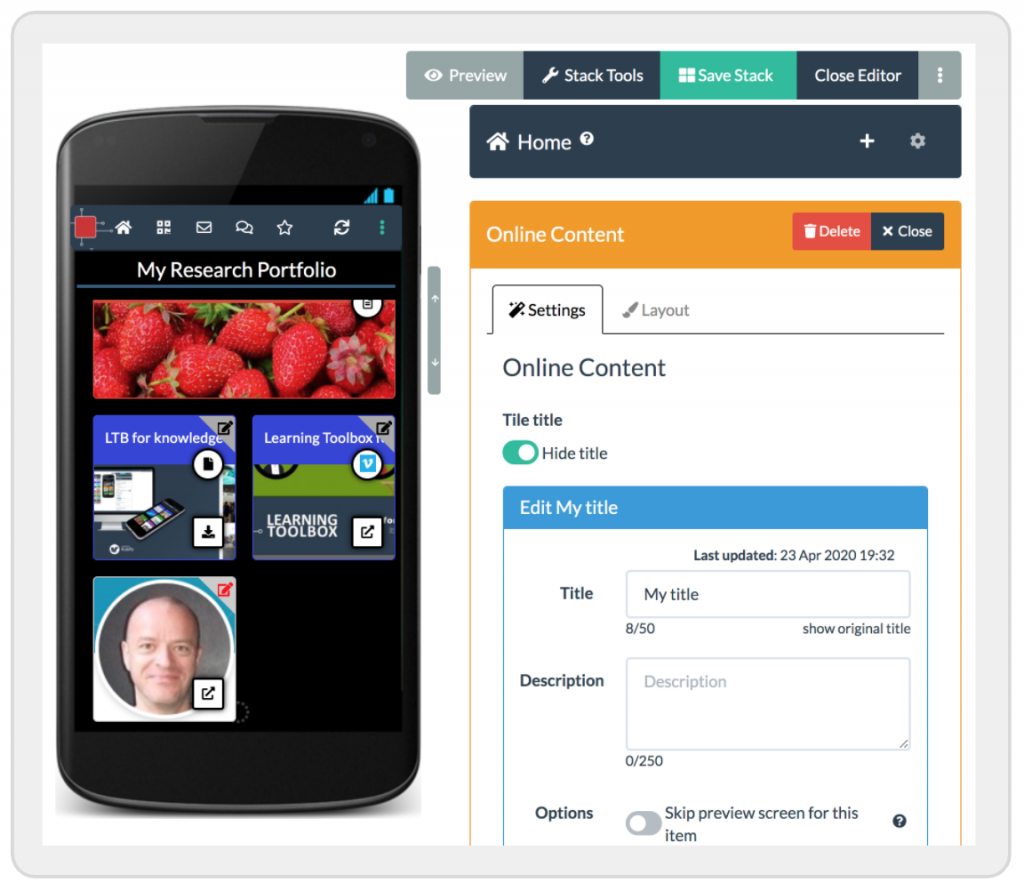
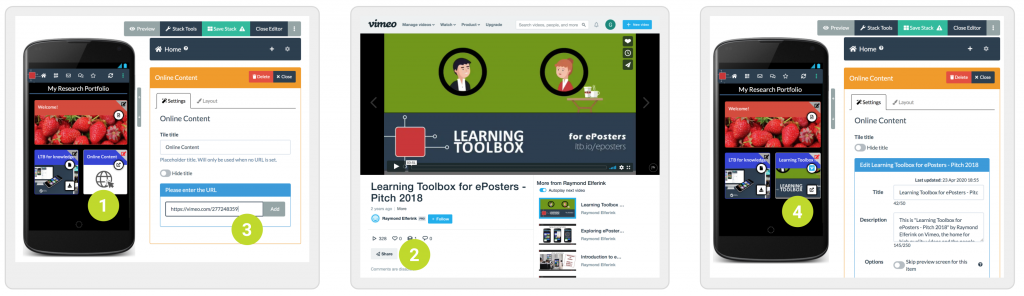
1. Drag an Online Content Tile from the Tile Library and drop it on the mobile phone.
2. Go to Vimeo (or YouTube), pick out some video you like, click on Share, and copy the link.
3. Paste the link into the text field below Please enter the URL and click on Add.
4. Learning Toolbox automatically generates a tile image from the video, which you can change with the image editor.
Step 13 – Add a LinkedIn profile
The instructions are the same than in Step 12 above, but use a LinkedIn URL rather than a link to a video. We also add the profile photo from LinkedIn as the tile image.
1. Drag another Online Content Tile from the Tile Library and drop it on the mobile phone.
2. Go to your LinkedIn page and copy the URL.
3. Paste the URL into the text field below Please enter the URL and click on Add.
4. Take a screenshot of your LinkedIn profile picture.
5. Click on Set image at the bottom of the settings (Settings tab) and following the instructions in Step 10. However, instead of picking an image from Pixabay, click on the gray Upload area and upload the screenshot you just took. Crop it so it fits the tile.
6. Toggle the button Hide Title at the top of the settings (Settings tab).
7. Click on Save Stack and then on Preview to try out your first stack!