If you can’t find the answer to your question below or in the FAQs then please contact us at support@kubify.co
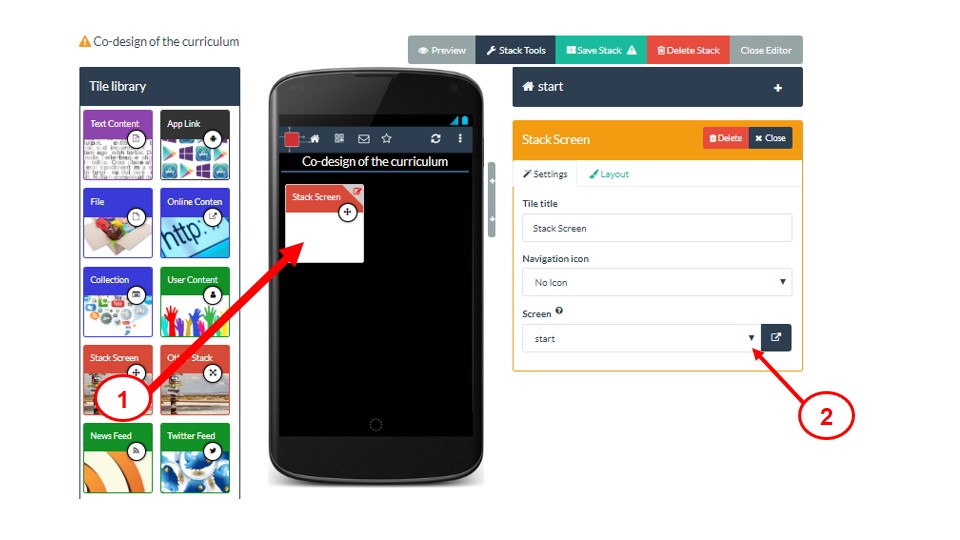
- Add a Stack Screen tile to your stack (1)
- The settings area will show which screen that tile is currently pointing at. Click on the down arrow (2) next to the target screen name and then choose “Create New Screen” from the menu that appears.
- This will immediately create a new empty screen (which will be connected to the stack screen tile you added) and move you to that empty screen
- It will give it a default screen name (3) which you can edit and change to something more meaningful
- You can now add new tiles to this screen as normal
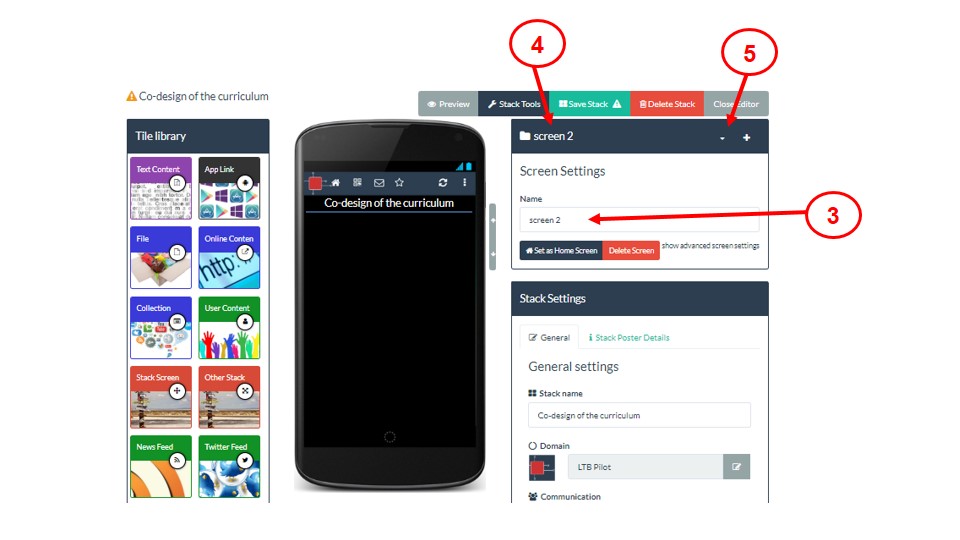
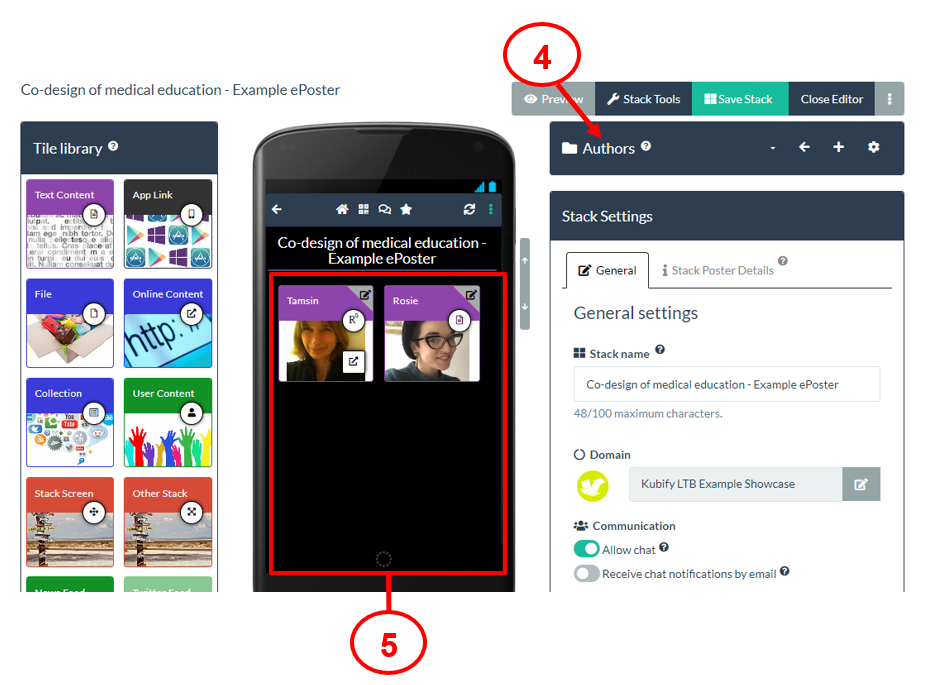
- Note that there is always a bar visible in the window that shows you the name of the current screen you are editing (4)
- When you want to move to another screen (e.g. back to the start screen) you can just click on the menu next to the current screen name (5) and choose the name of the screen you want to move to
If you have created different screens in your stack then this FAQ explains how you can move between them when you are editing your stack.
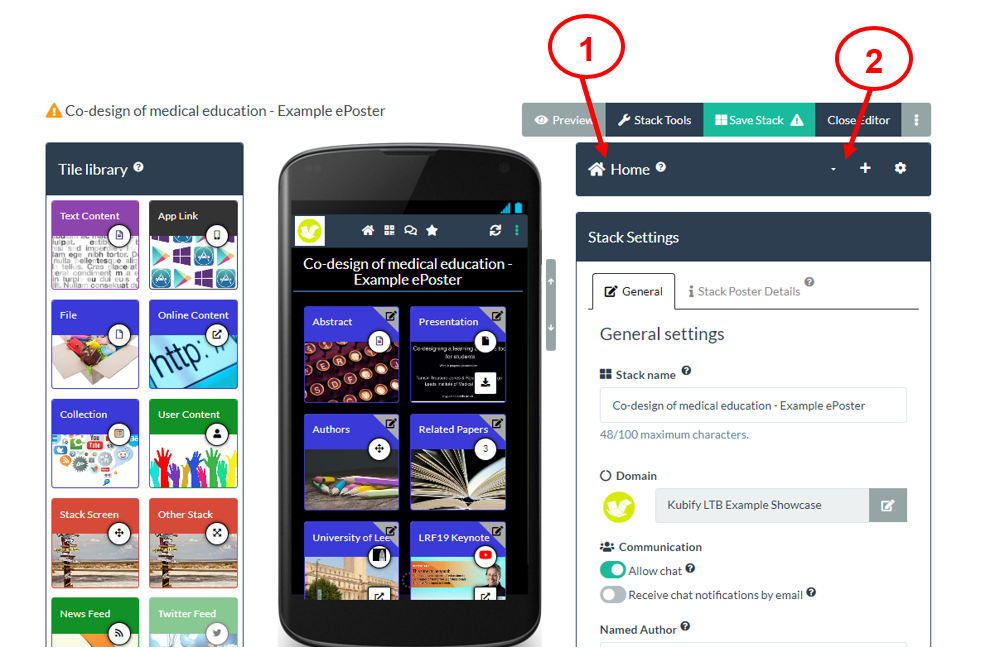
There is a bar (1) in the editor that shows the name of the screen that is currently showing in the mobile view or your stack.
If you want to move to a different screen then click on the drop-down menu icon (2) in that bar.
The drop-down menu will show you the names of the different screens in your stack (3). Choose the name of the screen you want to move to.
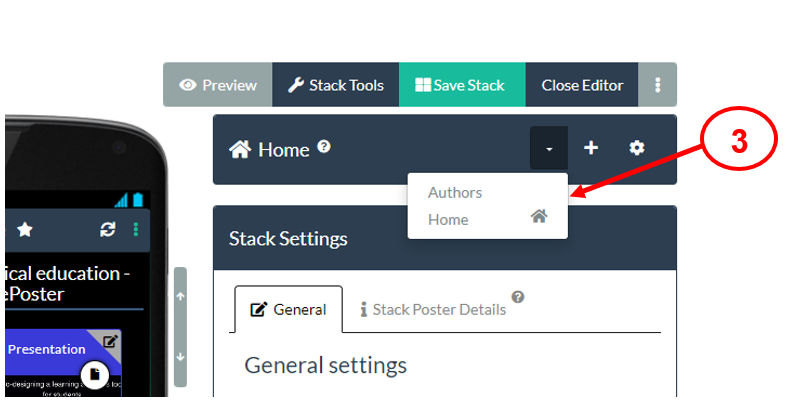
When you choose a different screen then that screen’s name will show in the bar (4) and you will see that screen in the mobile view of your stack (5). You can now use the Tile Library as normal to add more tiles to this screen or you can edit any tiles that you had already put on the screen.
Please remember that viewers of your stack will only see the Home screen. If you want them to have access to another screen then you must add a Stack Screen tile to your Home Screen and link that to the other screen. This FAQ explains how to use the Stack Screen Tile and this FAQ explains how you can move Tiles from one screen to another screen.
If you have created different screens in your stack (by using the Stack Screen Tile) then you may later want to move a Tile from one screen to another screen. You can do this in the Layout Tab of the Tile as shown below.
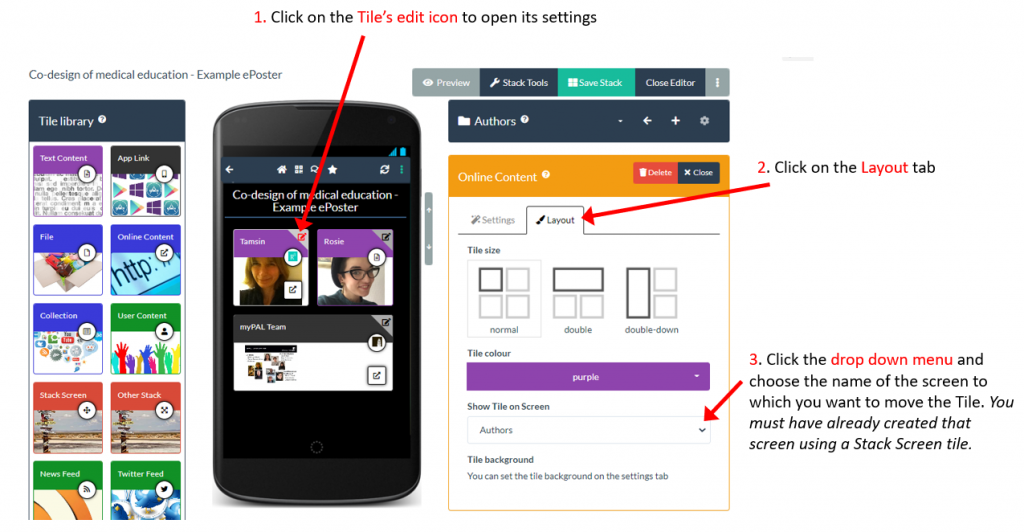
- Click on the Tile’s edit icon to open its settings
- Click on the Layout tab
- Choose the screen from the Show Tile on Screen drop down menu
The screen you want to move the tile to must already exist. The Stack Screen Tile is the easiest way to create a new screen and link to it.
Using templates
ECER has templates that you can use to start creating your ePoster if you want.
If you are adding a lot of material to your stack then you may find it useful to create an extra screen. You can do this by using the Stack Screen tile. This will allow you to add a tile that creates and opens a new screen.
To create an extra screen:
- Add a Stack Screen tile to your stack (1)
- The settings area will show which screen that tile is currently pointing at. Click on the down arrow (2) next to the target screen name and then choose “Create New Screen” from the menu that appears.
- This will immediately create a new empty screen (which will be connected to the stack screen tile you added) and move you to that empty screen
- It will give it a default screen name (3) which you can edit and change to something more meaningful
- You can now add new tiles to this screen as normal
- Note that there is always a bar visible in the window that shows you the name of the current screen you are editing (4)
- When you want to move to another screen (e.g. back to the start screen) you can just click on the menu next to the current screen name (5) and choose the name of the screen you want to move to
If you have created different screens in your stack then this FAQ explains how you can move between them when you are editing your stack.
There is a bar (1) in the editor that shows the name of the screen that is currently showing in the mobile view or your stack.
If you want to move to a different screen then click on the drop-down menu icon (2) in that bar.
The drop-down menu will show you the names of the different screens in your stack (3). Choose the name of the screen you want to move to.
When you choose a different screen then that screen’s name will show in the bar (4) and you will see that screen in the mobile view of your stack (5). You can now use the Tile Library as normal to add more tiles to this screen or you can edit any tiles that you had already put on the screen.
Please remember that viewers of your stack will only see the Home screen. If you want them to have access to another screen then you must add a Stack Screen tile to your Home Screen and link that to the other screen. This FAQ explains how to use the Stack Screen Tile and this FAQ explains how you can move Tiles from one screen to another screen.
If you have created different screens in your stack (by using the Stack Screen Tile) then you may later want to move a Tile from one screen to another screen. You can do this in the Layout Tab of the Tile as shown below.
- Click on the Tile’s edit icon to open its settings
- Click on the Layout tab
- Choose the screen from the Show Tile on Screen drop down menu
The screen you want to move the tile to must already exist. The Stack Screen Tile is the easiest way to create a new screen and link to it.
Answers to Frequently Asked Questions (FAQs)
You can find answers to more detailed questions on the FAQ page or by pressing the in-line help button (?) in the interface next to the item that you want to know more about.