An administrator can make a template stack so that other users can then use this as the starting point for their own stack.
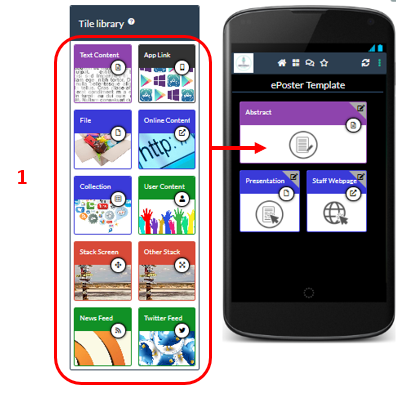
1. Create a stack as normal. Using the Tile Library, add and arrange the tiles that you want to be in your template stack.
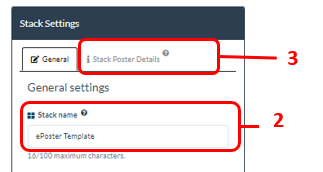
2. Give the stack a Name that makes it clear it is a template.
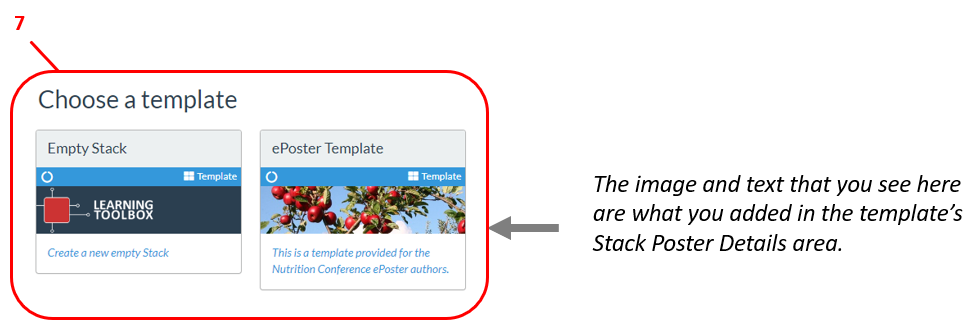
3. You can add a description and illustrative image in the Stack Poster Details area if you want to give users some information about this template.
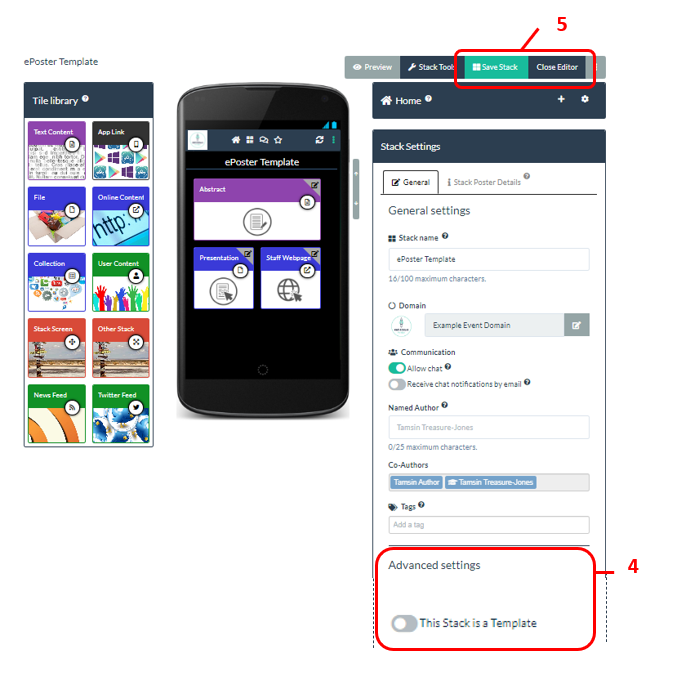
4. Before you save the stack, go to the Advanced settings area, find and turn on the ‘This stack is a template’ switch
5. Save the stack and Close the Editor
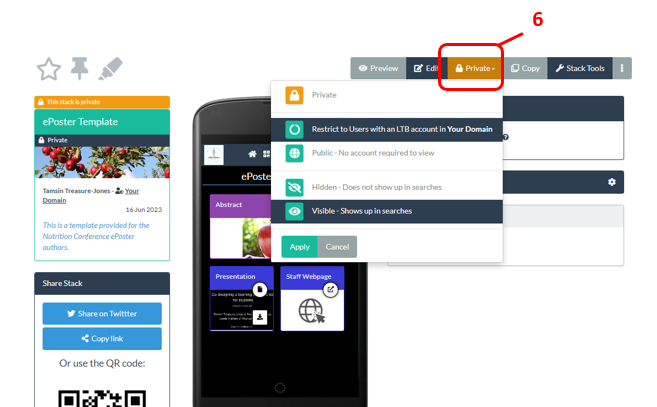
6. Set the stack access permissions to be Restrict to Users in Domain and Visible
You have now created the stack template.
7. Now when a user clicks on Create Stack they will be offered the choice of whether they want to create an Empty Stack or whether they want to create a stack using your Template. They just click on whichever they want to use.
When authors create a stack from a template then their new stack is initially created with the same structure as the template. However the author can still add extra tiles or delete tiles that were in the template. It provides them with a starting place but it does not then limit what they can do.
There is an FAQ answer for authors that helps to explain to them how to get started with using Templates. If you would like this FAQ answer to appear on your Support Page in Learning Toolbox (not just in the FAQ page) then please contact us (support@stack.services) to ask to have it added there.