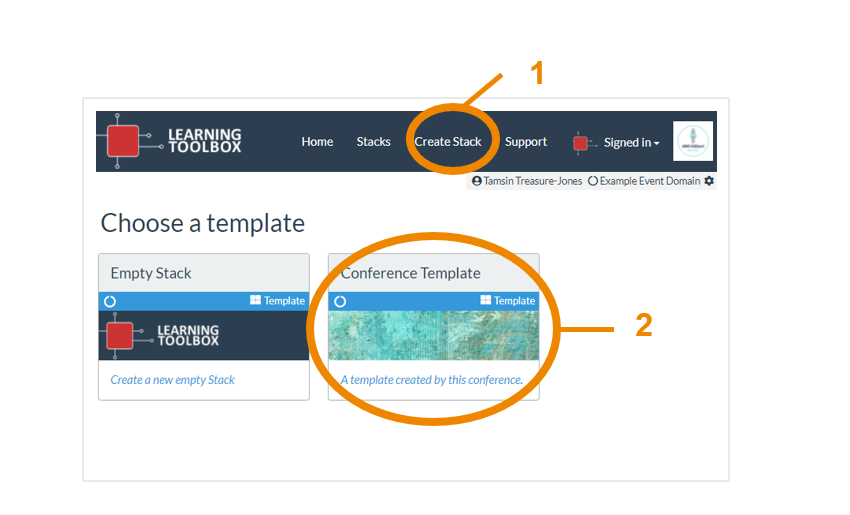
Some conferences have introduced templates for their ePosters stacks. If your conference has a template then when you click on Create Stack (1) then you will be offered the choice of either Creating from an empty stack or using a template (2).
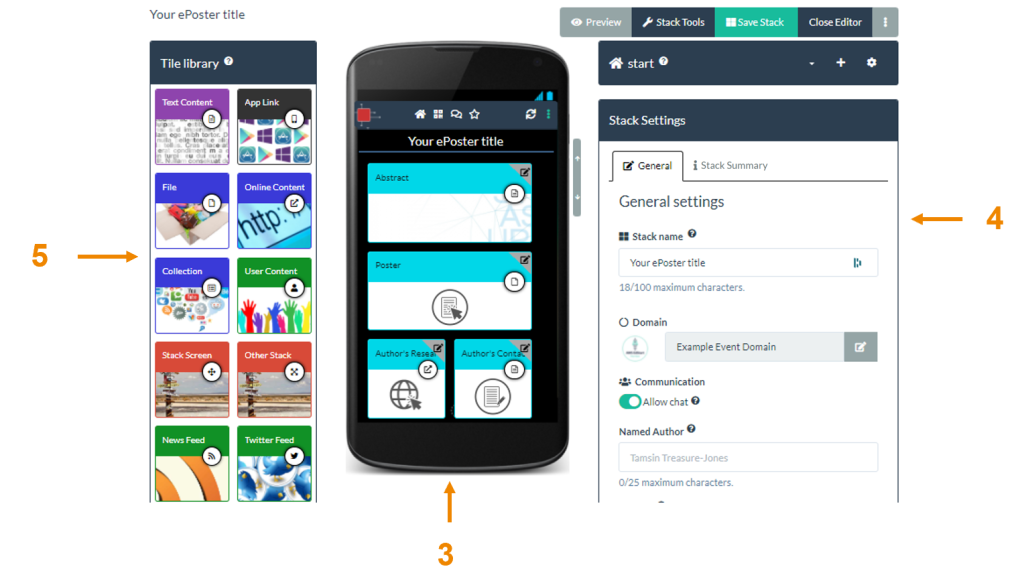
Your initial stack will then be created using the template and you will be taken to the editor. In the centre of this screen you will see a mobile view of your stack (3) containing the tiles (content) from your conference template. On the right you will see the general stack settings area (4) where you can add the summary information about your stack. On the left is the Tile Library (5) which you can use later to add extra tiles/content to your stack.
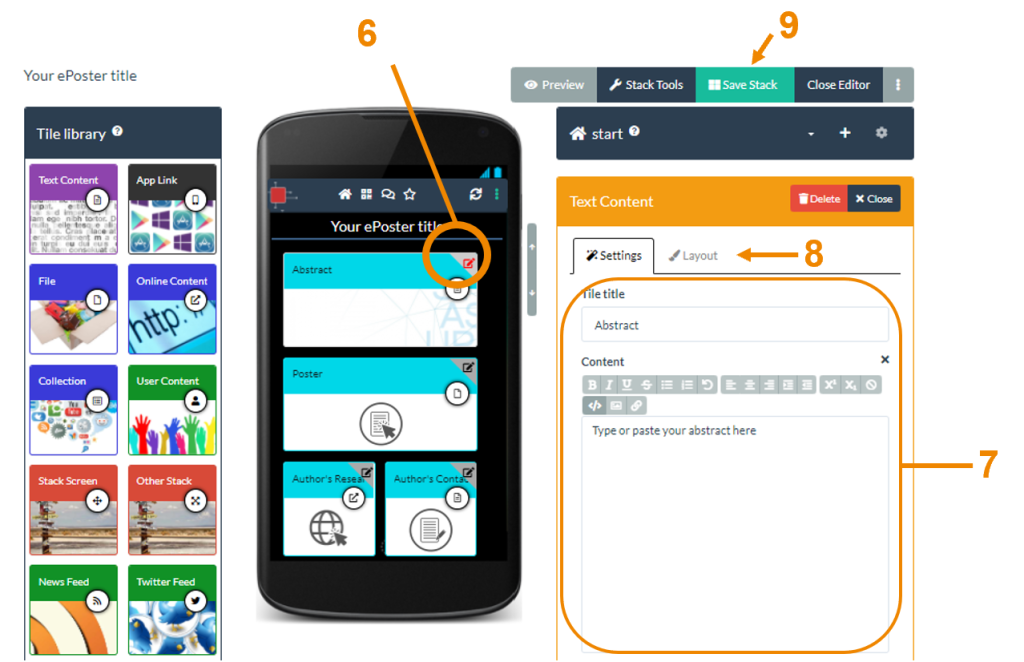
The mobile view with the tiles shows the information your conference is expecting you to include. You should edit each Tile to add the information they have requested. To edit a tile click on the tile edit icon (6) on its top right hand corner. The Settings area (7) will then change to indicate what type of content you can add to this Tile. Add it here in the settings area. You can also change the tile’s appearance (size, title bar colour and background image) in the tile’s Layout tab (8). Remember to save (9) your stack regularly.
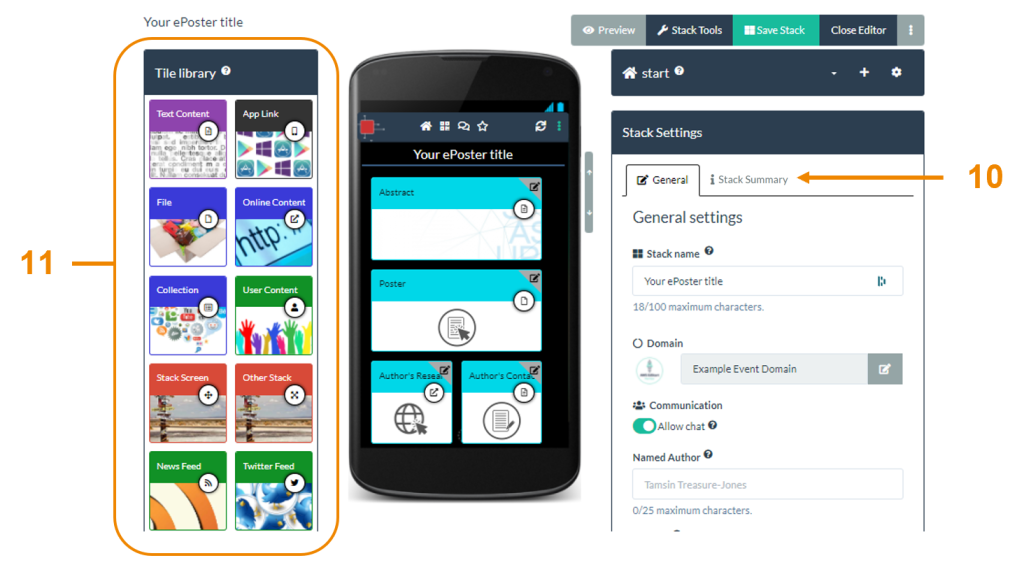
When you have finished editing all the tiles that are in your stack then you should also fill out your stack’s summary information in the Stack Summary tab (10) in the General Settings area. This summary information is used when people search the showcase, so it will help people to find your stack. You can also choose to add more tiles/content to your stack using the Tile Library (11). You simply drag and drop the relevant tile from the library into the mobile view of your stack and then add the required information in the settings area. Again, remember to save your stack before closing the editor or leaving the webpage.