Contents
- The focus of this guide
- Finishing and archiving the previous event
- Set-up a new showcase edition for your next event
- Ready to create your new event
- The focus of the next guide
Go to Event Admin Support Page
The focus of this guide
This guide covers the fifth of the key stages involved in setting up and managing an ePoster event in Learning Toolbox:
- Setting up an event and inviting authors
- Monitoring and supporting your authors
- Printing summary posters and publishing ePosters
- Onsite preparations and requirements
- Setting up next year’s event
It assumes that you have already set-up and managed one event in your Learning Toolbox domain. It shows you the key steps to follow so that you are ready to set up and manage your next event.
Finishing and archiving the previous event
Before setting up a new event, you should “archive” the ePosters/stacks made for your previous event. This will mean that the authors can no longer edit them, but they will still be viewable. Doing this will free up space in your domain so that new ePosters/stacks can be created for your next event.
In the Admin screen:
1. Click on the Event Management link
2. Then click on name of your previous event
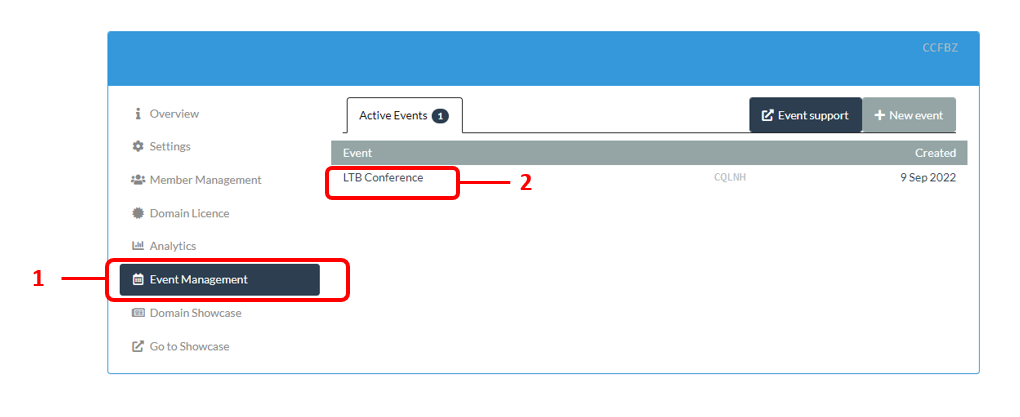
3. Then click on Archive Event
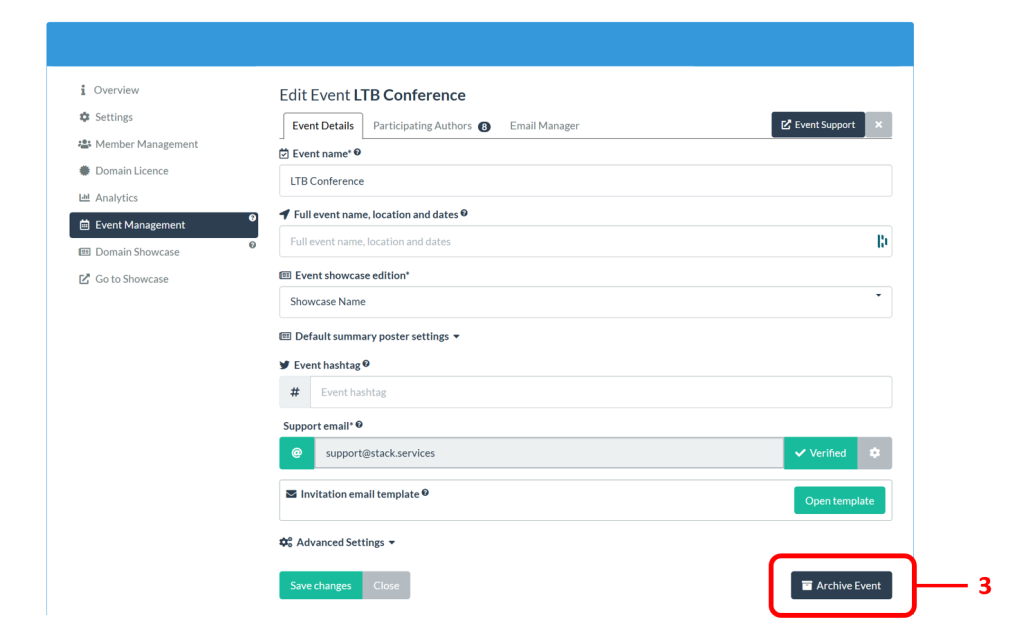
4. You will be asked to confirm this, click on Finish Event to confirm the action.

This event is now finished and archived. You will see that it no longer appears in your Active Events list, but instead appears in your Previous Events list.
Set-up a new showcase edition for your next event
You can now create a new showcase edition for your next event, so that its ePosters can be published to this showcase edition and kept separate from your previous events’ ePosters.
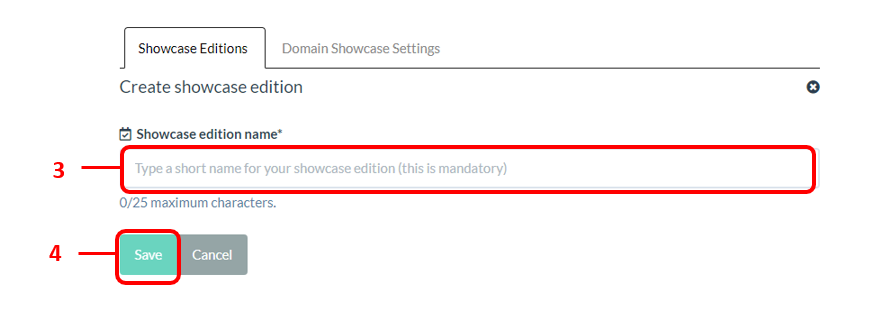
Create a new showcase edition
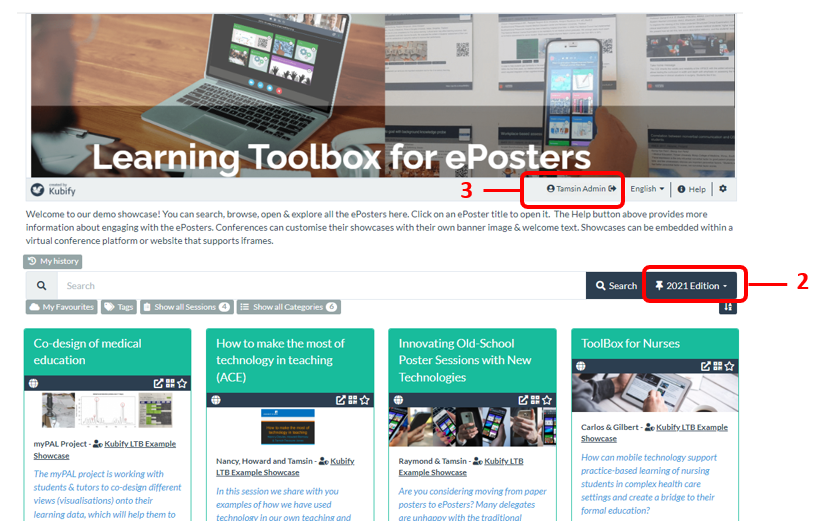
1. Click on the Domain Showcase button in the Admin screen
2. Then click on + sign to add a new edition
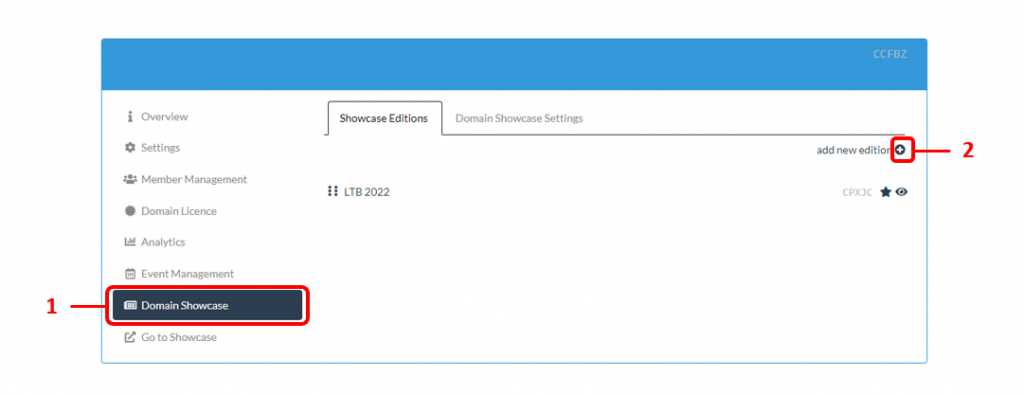
3. Give your new showcase a short name
4. Click on Save
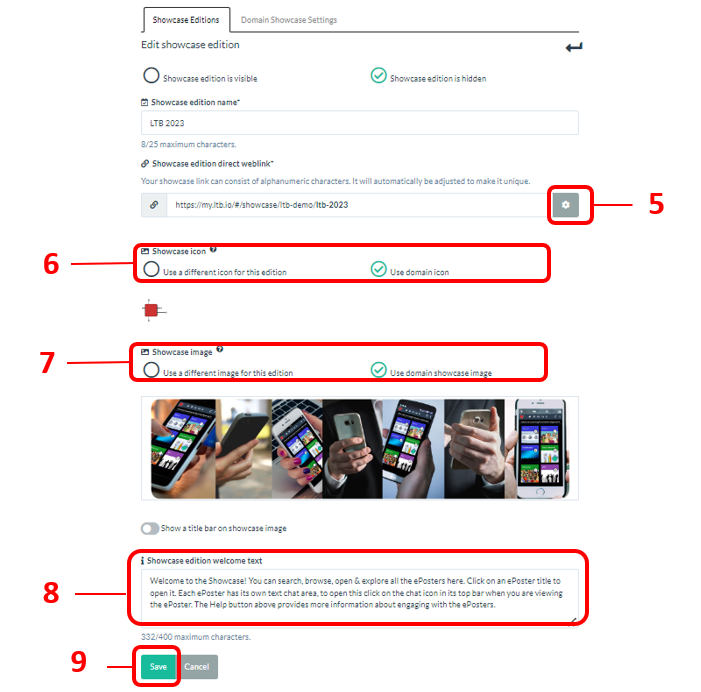
This then opens the showcase edition editing page. The important things to review and add here are:
5. Viewers will be able to access your showcase edition from your domain showcase web address, but in addition a direct weblink has been created for your showcase edition in case you want to later direct people specifically to this edition. You can change the end of this weblink address by clicking on the edit icon.
6. By default your showcase edition will use the domain icon, but you can choose to use a different image for this edition by clicking this option and setting the image.
7. By default your showcase edition will use the domain showcase image, but you can choose to use a different image for this edition by clicking this option and setting the image.
8. You should add some welcome text. This text will appear under the showcase image on your website to welcome viewers to your showcase.
9. Remember to Save after you have made any changes.
Making the new showcase edition visible and making it the default view
You do not need to make the showcase edition viewable and the default view immediately. As the administrator you will already be able to publish ePosters/stacks to the new showcase edition even before it is viewable. So, you can come back and make these changes to the showcase edition settings later if you would prefer. Some organisers keep the previous edition as the default view whilst the new ePosters/stacks are being created and only make the new edition viewable and turn it into the default view once they have published the new ePosters/stacks.
1. Next to each of the showcase editions there are two buttons. These control whether that showcase edition is viewable (the eye button) and whether it is the default view (the star button).
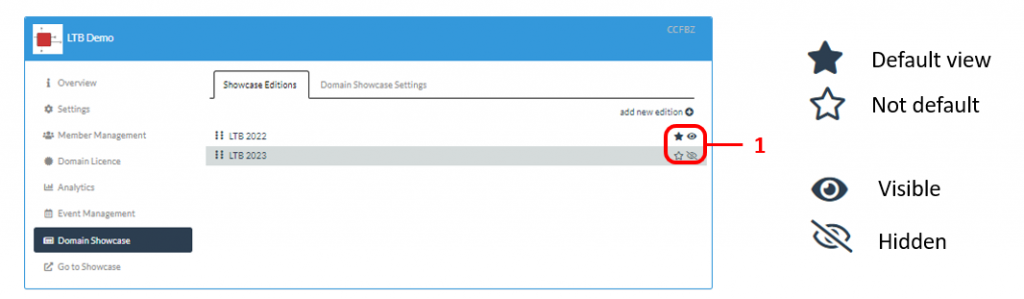
2. To make the new showcase edition viewable by everyone, then click on its eye button so that the eye appears open.

3. To make the new showcase edition the default view on the showcase webpage, then click on its star button so that it appears highlighted. You cannot make a showcase edition the default view unless it is also marked as viewable.

See how the showcase editions appear on the showcase webpage
1. Click on Go to Showcase to open your showcase webpage in your browser
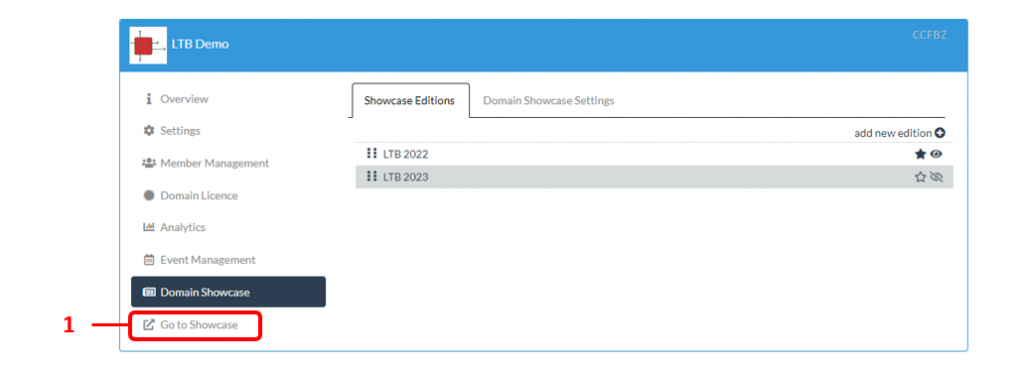
2. The showcase webpage will open in a new tab showing the showcase edition that you have marked as the default view. If any ePosters have already been published to this showcase edition then you will see them here. You can change which edition you are viewing by clicking on the edition dropdown menu that appears to the far left of the search bar.
3. As an Administrator you will see all the editions in the dropdown menu even if they are not visible to delegates yet. If you want to be absolutely sure that you are seeing the showcase as your viewers will see it (not as an administrator), then either sign-out or copy the showcase website address and open it in an incognito browser window.
Ready to create your next event and invite your authors
Everything is now set up so that you can create your next event and invite your new set of authors.
You can now return to Guide 1 on the Event Admin Support Page. and follow the steps set out there to set up a new event, edit the invite, add your authors and send out their invites.
You can then follow the steps in Guide 2 to monitor their progress and in Guide 3 to publish their ePosters/stacks.
We hope you enjoy continuing to use Learning Toolbox for your events.
Accessing all the event admin support guides
This guide is one in the set of event admin support guides.
These guides take you through all the steps involved in creating an event, inviting your authors and publishing the ePosters:
- Setting up an event and inviting authors
- Monitoring and supporting your authors
- Printing summary posters and publishing ePosters
- Onsite preparations and requirements
- Setting up next year’s event
There is also a Guide to using the Analytics Reporting Tool to see how people are engaging with your event ePosters.
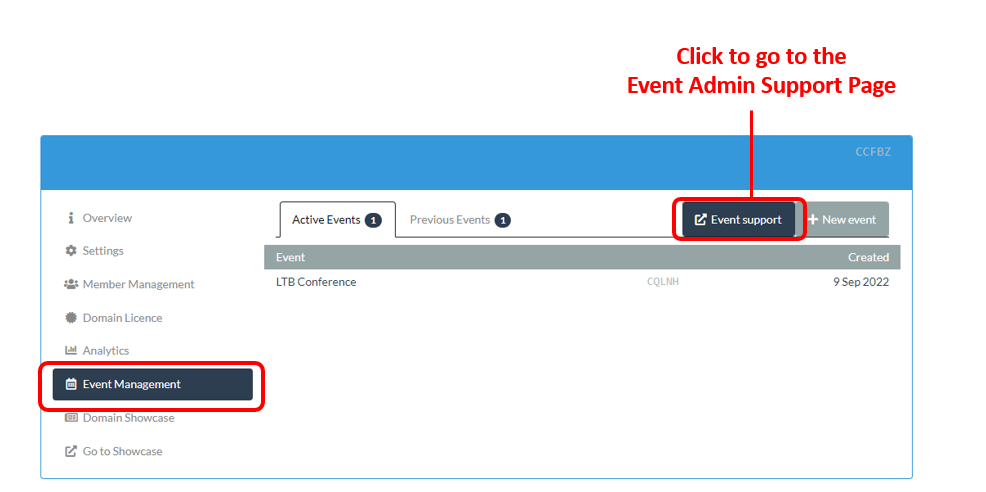
All the guides are accessible on the Event Admin Support Page. You can also get to that page from the Event Management area of the Admin Screen as shown below: