You have received an invitation by email to join a Learning Toolbox domain as an author or you have been asked to scan a QR code that will add you to a domain as an author. What’s all this about?
What is Learning Toolbox? What is a domain?
Learning Toolbox is a mobile platform that allows people to quickly and easily build stacks of interactive and multimedia content and information and share them with others.
What is a stack? A stack is a collection of documents, videos, apps, and other interactive materials that you can share with other people.
A domain is a private area in Learning Toolbox where people organise their stacks and manage users and authors. Think of a domain as an App Store that contains a bunch of stacks for people to download and open on their mobile phones or tablets.
What can I do in the domain I have been invited to?
Well, this depends on the owner of the domain who invited you. If they have added you as a Regular User, it means that you will have access to the private stacks in that domain. If you are an Domain Author, you will be able to create your own stacks and share them with others. If you have been added as a Domain Admin, you will be able to organise the domain, manage the users, and so on.
Sign me up to the domain
Before we start, please consider the following recommendations:
- If you have received an invitation link, for instance by email, we recommend you use a computer, laptop or larger tablet to go through the registration process. It works the same on a mobile phone, but the interface can feel a little cluttered.
- If instead you have received a QR code, we recommend you first get the Learning Toolbox app and create an account. Once you have done that, sign in to the Learning Toolbox on the app and scan the QR code.
I have received an invitation link…
…and I am on a laptop or computer
1. Click on the invitation link.

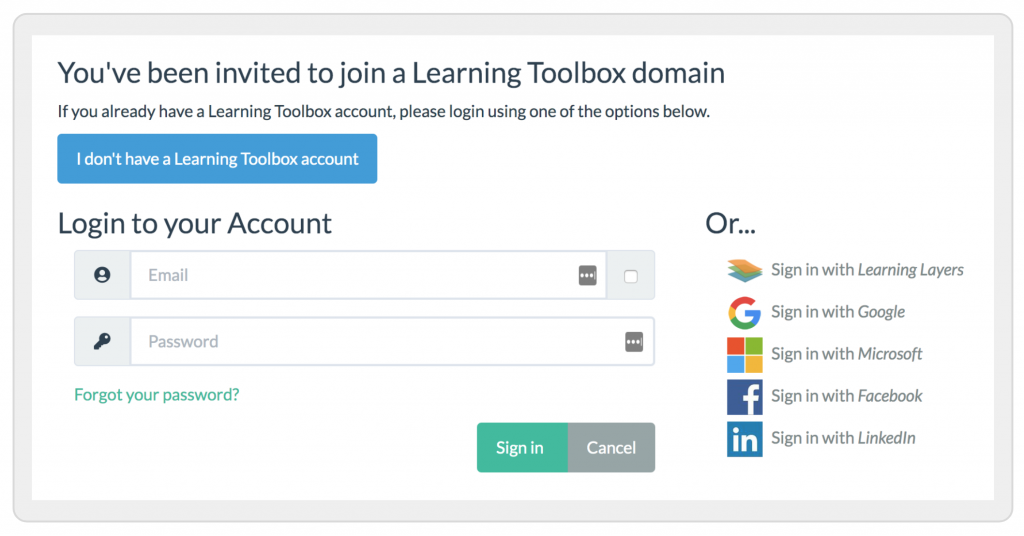
2a. If you don’t have a Learning Toolbox account already, click on I don’t have a Learning Toolbox account and follow the instructions. Once you have created your account, go to my.ltb.io and sign in to your account. If you need help with creating your account, see Create an Account (starting at Step 3). If you need help with signing in to your account, see Signing in to Learning Toolbox.
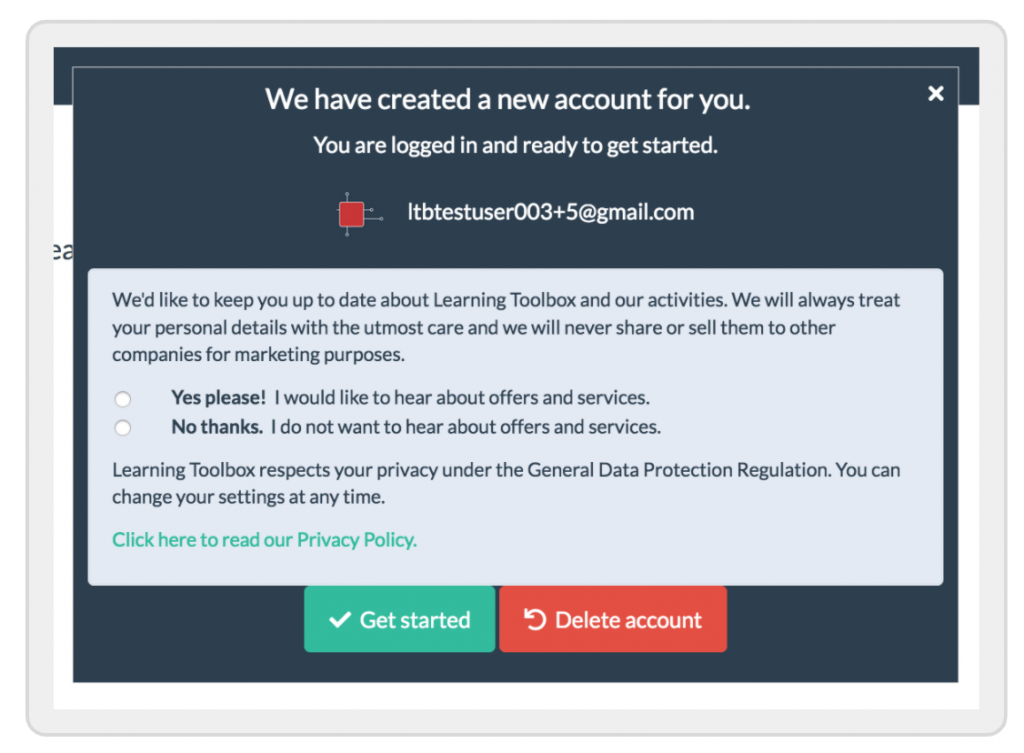
After you have signed in, you will see a confirmation that your account has been created. Click on Get started. You will see a message confirming that you have been added to the domain.

2b. If you already have a Learning Toolbox account, introduce your email and password and click on Sign in. Alternatively, use one of the Social Media sign-ins on the right.
After you have signed in, you will see a message confirming that you have been added to the domain.

…and I am on a mobile phone
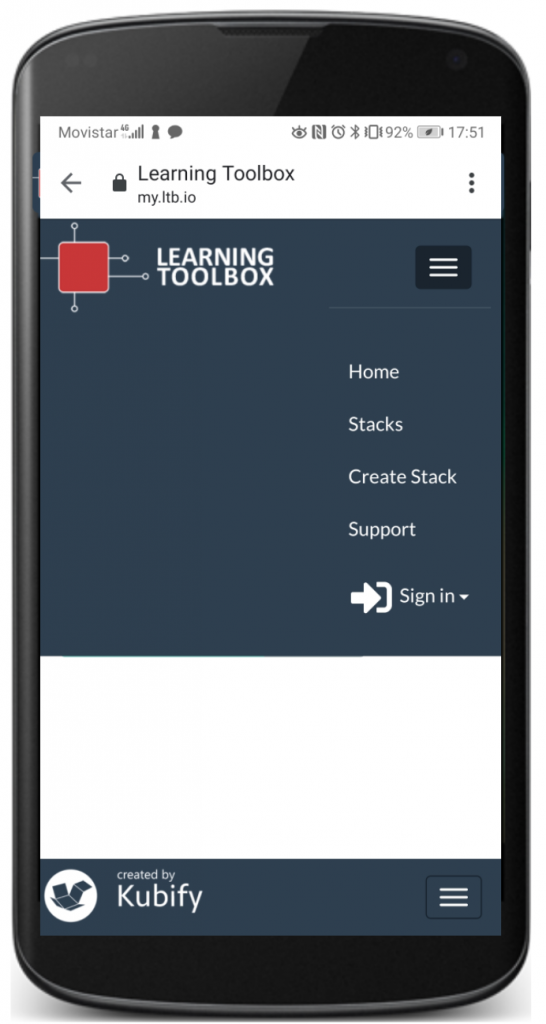
2c. The steps are the same than 2a/2b above, but to sign in under Step 2a, tap on the dropdown marked by three horizontal bars on the top right, then tap on Sign in.

ISSUE: When you sign on your mobile phone browser after you have created your account, you will see the confirmation that your account has been created (see screenshot in Step 2a under 3.1 above). Currently, this dialogue doesn’t scroll and on a smaller smartphone, so that you might not be able to reach the OK and Cancel buttons. Just click on the small cross ‘x‘ and you can get started. In case you want to delete your account but can’t reach the red button Delete account, please contact us at support@kubify.co.
I received a QR code…
…and want to use the Learning Toolbox app scanner
1. If you don’t already have the Learning Toolbox app installed on your phone, get it from here.
2. If you don’t have a Learning Toolbox account, create an account.
3. Sign in to the Learning Toolbox on the app.
4. Scan the QR code with the Learning Toolbox scanner.
5. You have now been added to the domain. To check this, go to Search and tap on the dropdown. The domain you have been added to should appear in the dropdown list.
…and want to use my own QR code scanner
For better results, we recommend you use the scanner of the Learning Toolbox app (see instructions above).
1. Scan the QR code with your own scanner.
2. The steps are now the same than under Step 2c for the invitation link above.
