Circles in Learning Toolbox help you organise your domain members especially when there are large numbers of members. You can manage your circle settings, circle members, and subscription codes in the Circle Management area.
Create a new circle
To create a new circle, click on Add another circle (1), provide a unique name for your new circle (2) and then click on Check (3).
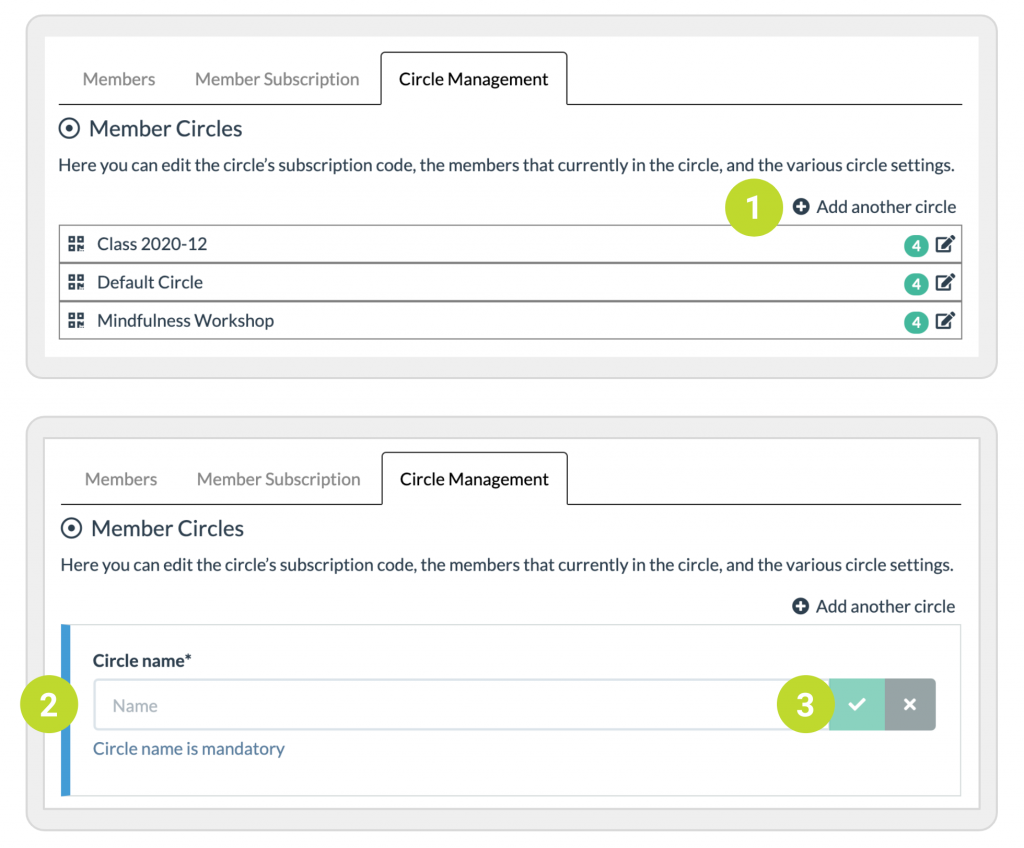
You can also create a new circle in much the same way under the User tab in the Member Subscription area.
Please be aware that the circles are not owned by those who created them and that they can therefore be changed and removed by any other domain author (if enabled by the administrator to manage users and circles).
Manage a circle
To open the circle management tools for a particular circle, click on the small edit icon to the right of the name of the circle (1).
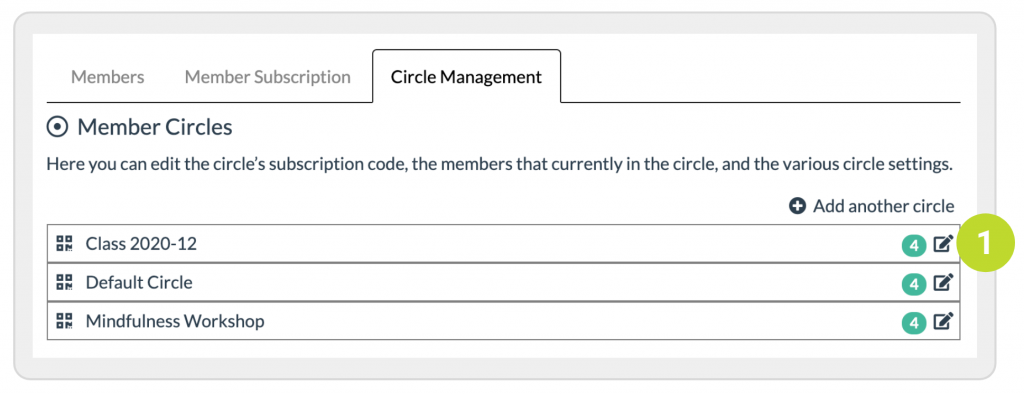
There are three tabs: Circle Subscription, Circle Members, and Circle Settings that we explain now.
1. Circle subscription
The support page How do I add somebody to my domain and circles gives you the details of how to create and use the subscription QR code and link (1) to invite users to your domain and circles.
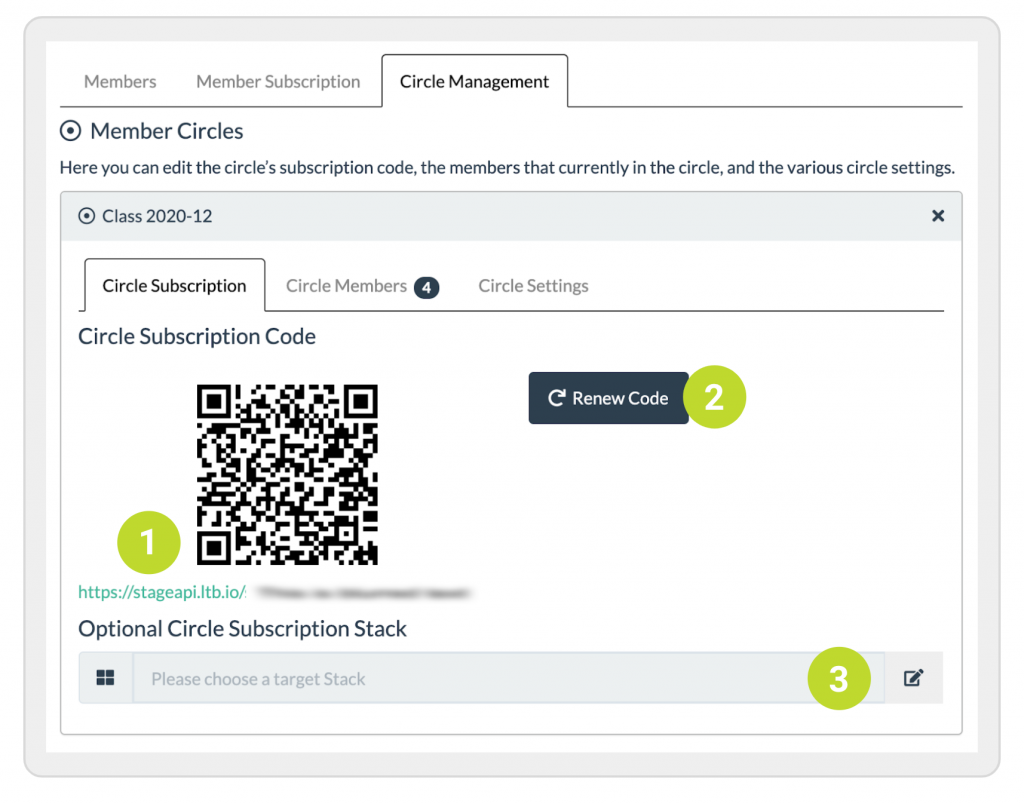
When you click on Renew Code (2), a new subscription QR code and link is generated. The old QR code and link are invalidated and users will not be able to sign up anymore to the circle anymore using these.
Circle Subscription Stack: Here (3) you can select a stack that will automatically open when the user scans the subscription QR code on the Android, iOS, or web app.
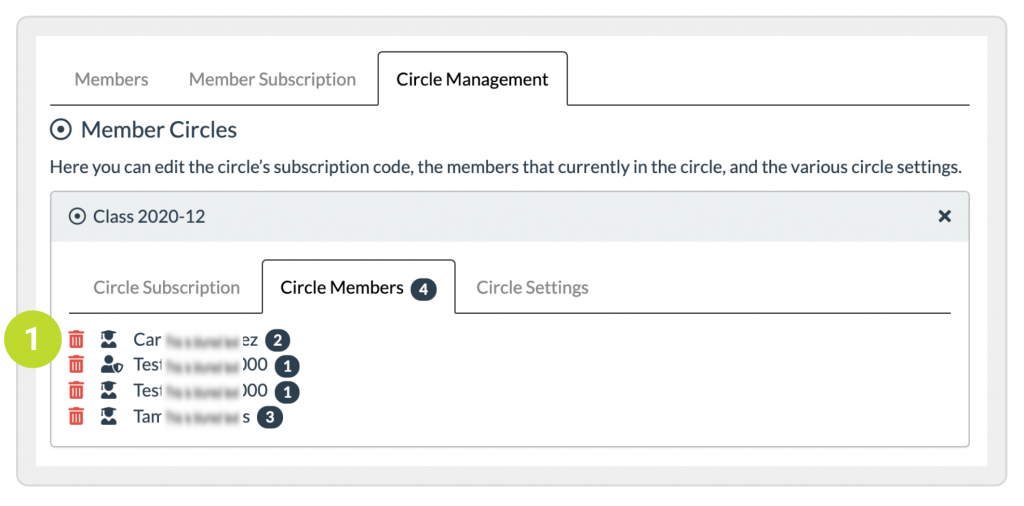
2. Circle members
In the Circle Members area, you can see all the members of a circle (1).
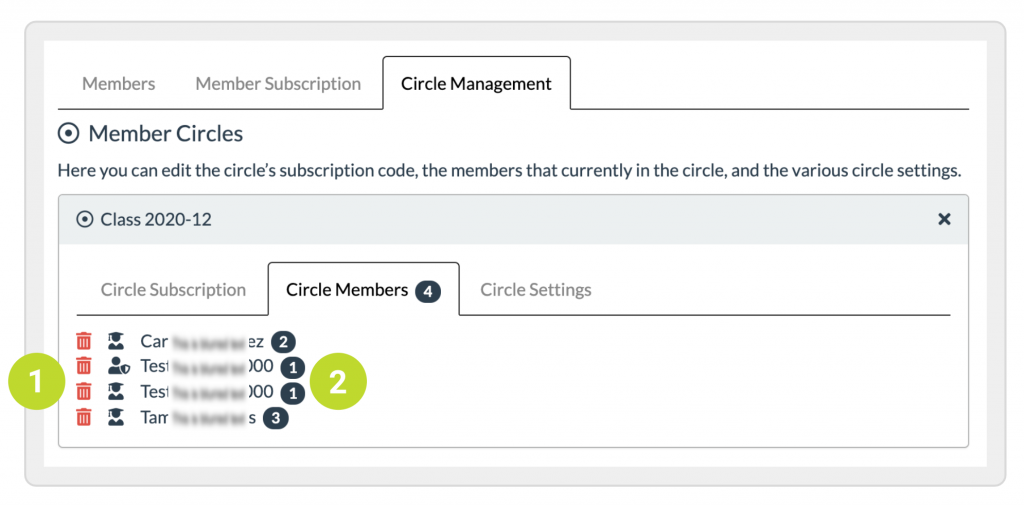
The little black number icon to the right of the name of the user (2) tells you how many circles that particular user belongs to. If you hover over the black number icon it shows you the names of the circle the user belongs to.
3. Circle settings
In the Circle Settings area you can change the main settings of the selected circle.
Rename a circle: To rename the circle, just type a new name into the text box (1).
Closing a circle: You can close the circle to new users (2) either by toggling the This circle is open button or by setting a date on which the circle will be closed automatically. Once a circle is closed, the subscription code won’t work anymore so that people can’t subscribe. Nothing changes however for members who are already in the circle. You can set a date (3) at which you want the circle to be closed.
Deleting the circle: You can delete the circle either by clicking on the Delete Circle Now button (4) or by setting a date on which the circle is deleted automatically (5). You also have the option to automatically delete users from the domain who are not in any other circles by toggling the Remove Users from domain who are not in other circles button (6).
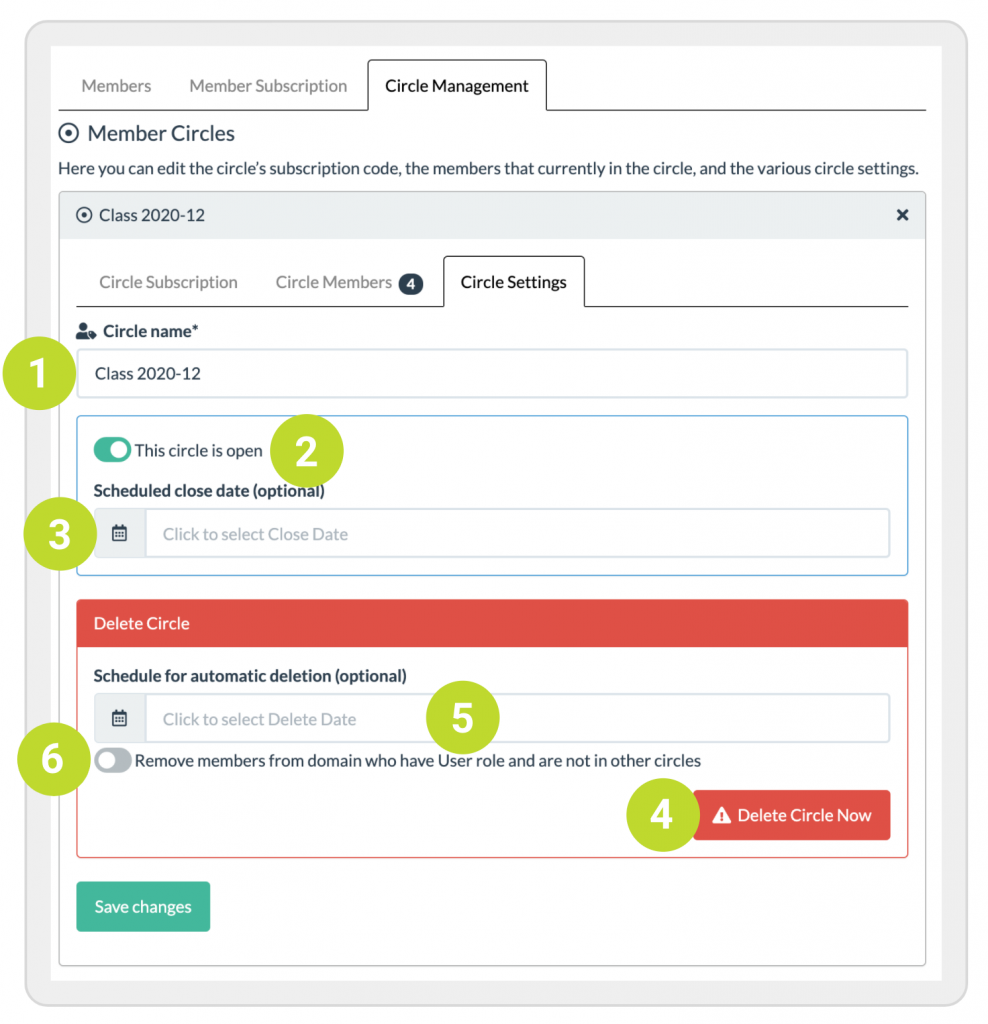
Setting the number of months to deletion: In the domain settings, the domain administrator can define the number of months until the circle will be deleted automatically. This can be useful when you have many users who are for instance enrolling in a course and you want to remove them automatically after the course has finished.
Don’t forget to save your changes!
Remove members from a circle
You can remove a member from the circle by clicking on Circle Members and then on the red trash can to the left of the name of the member. If the member is not in any other circle, you will have the option to delete them from the domain.