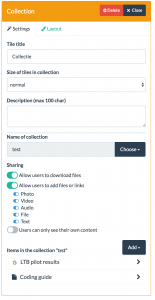
 The collection tile can store different kinds of documents, media files, and web links that the stack owner can add either via these tile settings or by using the asset manager that can be accessed through Manage Assets in the stack view mode. It is also possible for users to upload content to a collection tile from the LTB App if the owner has enabled upload. Here a brief description of the different settings and then further below some more details.
- Tile title: The title text shown in the upper part of the tile.
- Size of the tiles in the collection: Whether the tiles representing the items in the collection are of normal, double, or double down size.
- Description: A short description of the collection.
- Name of collection: Think about collections as if they were folders on your computer. The collection name is unique, just like a folder name. If you use the same collection name in different tiles in any given stack, then it will contain the same elements. To change the collection name, click on the little cogwheel
 . You need to click on
  to save the name.
 - Sharing: There are three different sharing options.
- Allow users to download files: If enabled, users can open / download content in an external browser or third party app. If disabled, content opens in a viewer inside the LTB App.
- Allow users to add files and links: If enabled, the user can upload content via the LTB App. The stack owner can restrict upload to certain file types by toggling the appropriate options (photo, video, audio, file, text).
- Users can only see their own content: By default, content uploaded by a user to a collection tile is visible to all users of the stack. If this option is selected, users will only see the content they have uploaded themselves to the collection tile. And also the content that the stack owner has uploaded.
- Items in the collection: This is the list of all items that are in the collection. If users upload content to the collection, you might need to refresh your browser to see the updates.
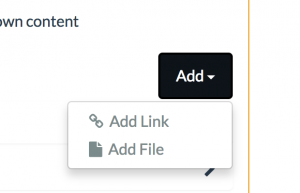
Add an item: To add an item, click on the “Add” button and choose whether you want to upload a file from your computer or link to a web resource.
To add a link, just copy the URL into the field and press “Add”.
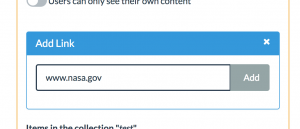
Once the link is added, the details view of the item will open (for details, see below under edit an item).
To add a file, either drag and drop it from a folder on your computer onto the shaded area or click on the shaded area to select from file picker.
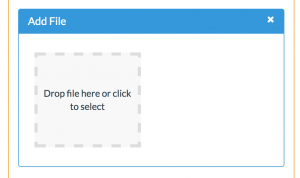
Once the file has been uploaded to our servers, the edit view opens (for details, see below under edit an item).
Edit an item: To edit an item, simply click on it
![]()
This will open the details view of the item.
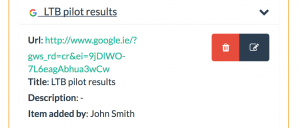
In this case, the item type is a link. To edit the item, click on the blue edit button ![]() .
.
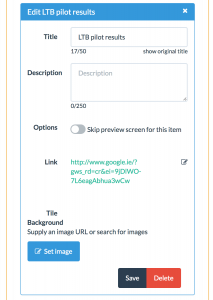
Both the title and description are automatically extracted from the link resource. You can change the item title, which will appear in the top bar of the tile, and the description. You can also add a link to an image that will appear on the bottom half of the tile or override the one that might have been extracted from the link resource (in this case no image link was extracted).
Don’t forget to save your changes once you are done!
