Screen settings
The layout of the screen settings can vary depending on what screen is selected and whether you have already navigated to other screens since you have opened the stack.

The start screen is the screen that shows first when you load the stack into the LTB App or when you tap on the home icon in the top menu bar of the app. The start screen is marked with a home icon ![]() in the screen settings. You can switch screens with the dropdown menu (tap on the little downward arrow
in the screen settings. You can switch screens with the dropdown menu (tap on the little downward arrow ![]() to the right of the screen name) showing all the screens that are in the app you are editing. To add a new screen, tap on the plus icon
to the right of the screen name) showing all the screens that are in the app you are editing. To add a new screen, tap on the plus icon ![]() . To navigate back to the previous screen in the emulator, click on the back arrow
. To navigate back to the previous screen in the emulator, click on the back arrow ![]() .
.
If the screen that shows in the stack emulator is not the start screen, you can do two more things. First, you can delete the screen by clicking on the “Delete Screen” button. Use with care since this can not be reversed at this moment. Second, you can set the screen as the new start screen by clicking on “Set as Start Screen”. The start screen cannot be deleted since a stack always has to have at least one screen, even if there are no tiles on it.
Stack settings
These are settings that affect the whole stack.
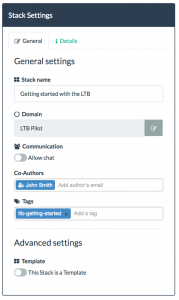
General settings

- Stack name: The name of the stack.
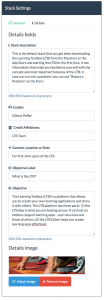
- Stack description: A description of the stack.
- Allow chat: Click on the toggle button to enable or disable the stack-level chat feature (grey = disabled; green = enabled).
- Tags: Add searchable tags by typing the tag names separated by a comma or by pressing Enter.
Details settings

