There are two different ways in which you could include a video in your stack. Both approaches will allow the video to be played inside your stack.
1. As a File
You can add a video using the File Tile. Drag and drop a File tile from the Tile Library into your stack (1) and then click in the Add File box (2) in the Settings area and add the video file from your computer.
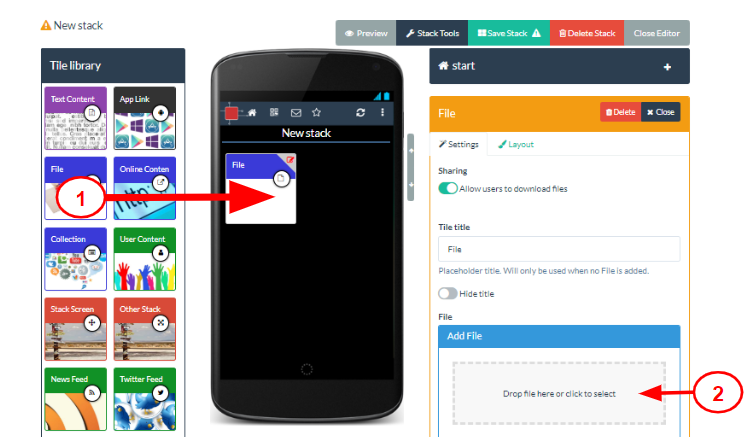
The file will be uploaded and will be processed. You can continue editing and add other tiles whilst this processing is being done. Whilst the video is being processed there will be a default image showing on your file tile. Once the processing is finished then the tile will show a still image from your video as the tile image. However you can can change the tile’s background image as normal once the processing is finished.
Please note there is a 400MB file size limit on files uploaded using the File Tile. If your file is above this size then we recommend that you consider saving your video in a lower resolution (more suitable for viewing on the web) before uploading it. If however you do want to add a larger video file then you can do this by uploading it to a video sharing platform first and then add it to your stack as an online content tile (see below).
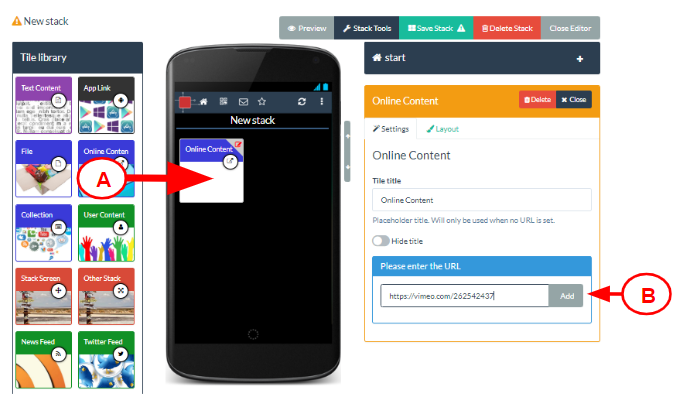
2. As Online Content (linking to a video sharing platform)
Another way to add a video to your stack is to upload your video to a video sharing platform like YouTube or Vimeo first. In Learning Toolbox you can then add an Online Content tile to your stack (A) and add in the url link (web address) to where your online video appears on the video sharing platform (B).